 How-to
Why Does My Water Heater Leak?
Quick Summary
A water heater leak usually starts in one of three places: the tank, the valves, or the supply lines. Most failures come from the tank itself, which accounts for about 69% of cases. Finding the wet spot tells you how urgent the problem is.
- Tank leaks cause about 69% of water heater failures, making the tank the most common source.
- Valve malfunctions account for roughly 13% of failures and supply line failures about 10%.
- A typical residential water heater lasts about 8 to 12 years.
- Dry all fittings, wait 20 to 30 minutes, then check each zone to find the source.
- Shut off the water supply and power before touching any fitting during an active leak.
Table of Contents
- Why Does My Water Heater Leak?
- Why Water Heaters Leak: The Most Common Causes
- How to Tell Where the Water Is Coming From
- Water Heater Leaking From the Bottom
- Water Heater Leaking From the Top
- Water Heater Leaking From the Pressure Relief Valve
- What to Do When a Water Heater Leaks Right Now
- Booking Your Water Heater Inspection in Greater Vancouver
- Frequently Asked Questions
Why Does My Water Heater Leak?
Last Updated: November 12, 2026
If you have found water pooling around your water heater, you are not alone. A water heater leak is a common call for plumbers across Greater Vancouver, and the cause is usually easier to find than most homeowners expect. A water heater leak is rarely random. Most leaks start in one of three places: the tank, the valves, or the supply lines. Knowing which one is wet tells you how urgent the problem is.
According to Rapid Eye Inspections' analysis of water heater failure and replacement causes, about 69% of water heater failures come from a leak in the tank or a burst tank. Valve malfunctions account for roughly 13%, and supply line failures for about 10%. So the tank itself is the most common source, and that is the one to take seriously.
This guide walks you through the common causes, how to find where the water is coming from, and what to do right now. Start with safety, then work through the checks below.
Share of water heater failures by cause
Why Water Heaters Leak: The Most Common Causes
Water heaters leak for a few common reasons. Most of them come down to age, pressure, or a loose connection.
- Tank corrosion: Water sits in the tank and slowly eats away at the steel. Over time, small holes form.
- Failed anode rod: The anode rod protects the tank from rust. When it wears out, the tank starts to corrode faster.
- Thermal expansion: Heated water expands. Without an expansion tank, pressure builds and can push water out through weak points.
- Pressure relief valve discharge: A valve that releases water can drip after it lets off pressure.
- Loose fittings: Inlet and outlet connections can work loose over time, especially after vibration or a recent repair.
- Drain valve problems: Sediment buildup can keep the drain valve from closing fully.
A typical residential water heater lasts about 8 to 12 years, according to Lennox's general guidance on equipment longevity. If your unit is near the end of that range, a leak often means replacement is the better choice.
How to Tell Where the Water Is Coming From
Finding the source is a process of elimination, not a guess. Dry everything first, then let the unit sit and watch where moisture returns. A flashlight, a dry rag, and 20 to 30 minutes of patience will tell you more than any single check.
Step 1, Dry and wait. Wipe the tank, all fittings, the T&P discharge pipe, and the floor around the base until they are dry. Wait 20 to 30 minutes without running hot water. Then inspect each zone in this order: top fittings, T&P discharge, supply lines, drain valve, tank base.
Step 2, Use the location to narrow the cause.
- Top of the tank, at the inlet or outlet fittings: Loose unions, worn dielectric nipples, or failed gaskets. Often the cheapest fix.
- T&P discharge pipe (the copper or plastic pipe running down the side): The valve is releasing. A few drops after a heating cycle can be normal; continuous flow is not.
- Supply lines and shut-off valves: Look for drips at the hex nuts and at the valve body. Flexible braided lines can weep at the crimp.
- Drain valve at the bottom: Sediment can hold the valve open. A slow drip here is common and usually repairable.
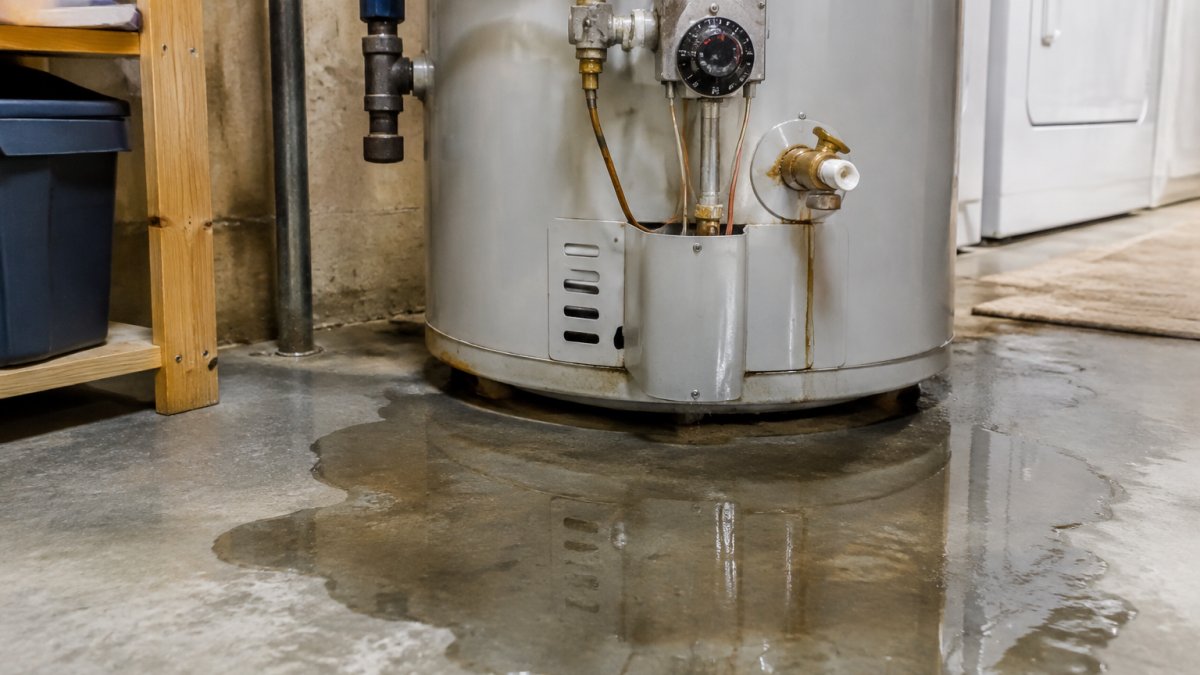
- Bottom of the tank, under the base: The most serious location. Water seeping from the tank shell itself usually means internal corrosion has breached the steel.
Step 3, Rule out condensation before you panic. Condensation is the most common false alarm, especially on a newly installed unit, in a cold basement, or when the heater sits in a humid space. The tell is pattern: condensation appears as a fine film or beads spread across the tank and cold lines, and it returns evenly after you wipe it. A real leak returns in one spot, a drip, a trail, or a puddle that grows from a single point. Wipe the unit dry, wait, and look for a concentrated point of return rather than general dampness.
Step 4, Confirm with the paper-towel test. Wrap a dry paper towel around each suspect fitting and the T&P discharge pipe, and lay one flat under the drain valve and along the tank base. Check back in 15 to 20 minutes. The towel that is wet tells you which zone is active, and the shape of the wet patch shows whether it is a drip from above or seepage from the tank itself.
Watch out: Do not assume a bottom leak is the drain valve just because the valve is nearby. Water from a failed tank shell can run along the base and pool at the drain valve, making a tank breach look like a valve drip. If the drain valve is dry at the towel but water still appears under the base, treat it as a tank leak until a technician proves otherwise.
If two zones test wet at once, start with the highest one, water runs down, and a top fitting leak can mimic a bottom leak by the time it reaches the floor.
Water Heater Leaking From the Bottom
A leak at the bottom of the tank is the most serious type. It often means the tank itself has failed. Water that pools under the base usually comes from corrosion inside the tank, which opens small holes that you cannot repair.
Check the drain valve first. Look for drips at the valve and a sediment buildup that keeps it from sealing. A worn drain valve gasket can often be replaced. If the tank wall is leaking, you will usually need a new water heater.
Watch out: Do not try to patch a leaking tank. A sealant will not hold, and the tank can fail completely.
Water Heater Leaking From the Top
Leaks from the top usually come from the inlet and outlet connections or the fittings above the tank. These are often the easiest to fix. Loose fittings can sometimes be tightened. Worn gaskets or washers may need replacing.
Check the shut-off valves above the heater as well. If water drips from a valve body, the valve may need replacing. Always shut off the water supply before you touch any fitting.
Water Heater Leaking From the Pressure Relief Valve
The pressure relief valve, often called the T&P valve, protects the tank from dangerous pressure and heat. It is designed to release water when pressure gets too high. A small amount of water from the discharge pipe can be normal.
Continuous dripping is a problem. It can mean the tank has too much pressure, the thermostat is set too high, or the valve itself has failed. Thermal expansion is a common cause, especially in homes with a closed plumbing system and no expansion tank. A plumber can test the pressure and decide whether the valve needs replacing or whether the system needs an expansion tank.
What to Do When a Water Heater Leaks Right Now
Active water around a water heater is a race against floor damage. The first ten minutes matter more than the diagnosis. Work through these steps in order, and do not skip ahead to repairs until the water is stopped and contained.
- Kill the energy source first. For an electric unit, switch off the breaker at the panel, not just the unit's own switch. For a gas unit, turn the gas control knob to "pilot" or "off" and do not relight it yourself. If you smell gas or see scorching or soot near the burner compartment, leave the area immediately and call your gas utility or 911 from outside.
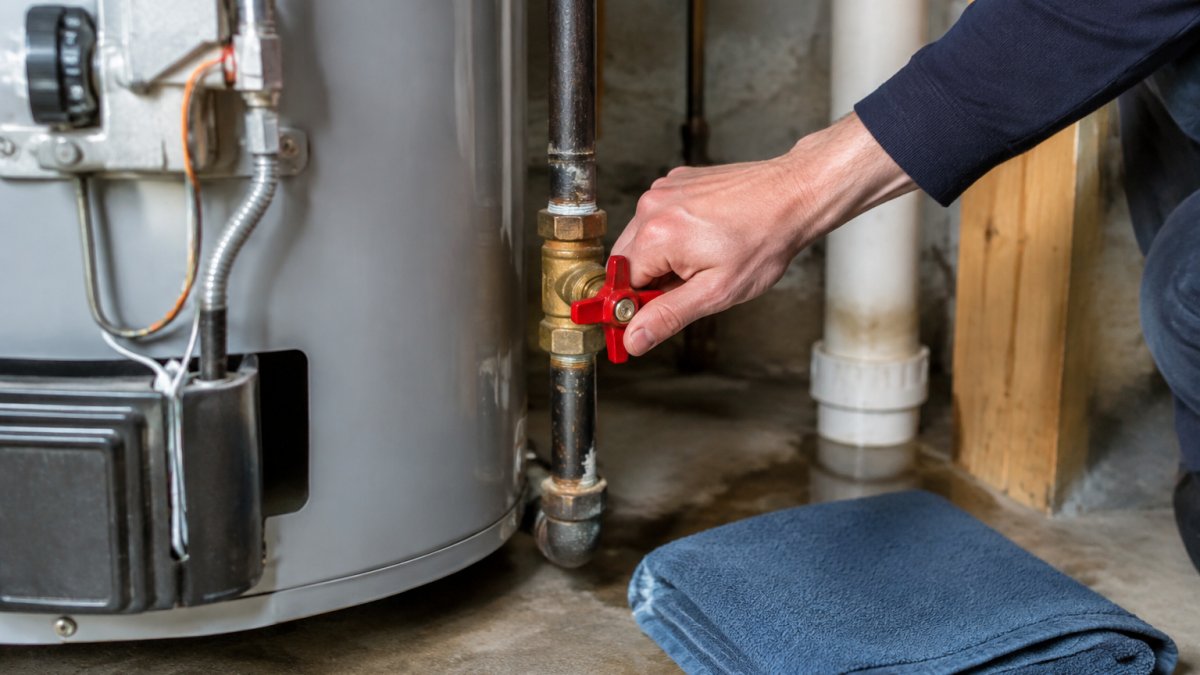
- Shut off the cold-water supply. Find the shut-off valve on the cold inlet line above the heater and turn it clockwise until it stops. If the valve is stuck or weeping, close the main water shut-off for the home instead. A common pattern is a gate valve that has not been turned in years and will not seat, if it will not close fully, go to the main.
- Relieve the tank pressure. Open a hot-water tap at a nearby sink to bleed pressure off the tank and lines. This slows the leak and makes the drain step safer.
- Drain the tank only if the leak is from the tank or a fitting you cannot isolate. Attach a garden hose to the drain valve, run it to a floor drain, laundry sink, or outside, and open the valve slowly. Never drain a hot tank onto a finished floor, the water is scalding and will warp flooring.
- Contain and extract. Towels and buckets buy time, but a wet/dry vacuum is what actually prevents water from wicking under baseboards and into subfloor. Pull back rugs and move stored items at least a few feet away. If water has reached drywall, mark the water line with tape so you can show it to the plumber and your insurer.
- Document before you clean up. Take photos and a short video of the leak point, the pooling, and any damaged belongings. Home insurers generally expect prompt mitigation and evidence, so documentation can support a claim.
- Call for help. A tank leak or a failed T&P valve is not a DIY fix. Peace of Mind Plumbing & Heating Ltd. offers 24/7 emergency service across Greater Vancouver.
Watch out: Do not tape, clamp, or apply sealant to a leaking tank or valve body as a permanent fix. A patch may hold for hours and then fail catastrophically, and on a pressurized tank that can mean a sudden release of scalding water. Treat any patch as a stopgap only until a technician arrives.
Once the water is off and contained, keep the area ventilated and run a fan or dehumidifier to start drying. Damp building materials can allow mold to establish quickly, so drying is part of the emergency response, not an afterthought.
Once the water is stopped, these are the main leak sources and what the article says to do about each.
| Problem | Cause | Fix |
|---|---|---|
| Water pooling under the base | Corrosion breaching the tank wall | Replace the water heater |
| Drips at the drain valve | Sediment holding the valve open | Replace the drain valve gasket |
| Leak from top fittings | Loose inlet or outlet connections | Tighten fittings, replace worn washers |
| Continuous T&P valve discharge | Excess pressure or a failed valve | Test pressure, replace valve or add expansion tank |
| Water after shutting the valve | Gate valve that will not seat | Close the main water shut-off |
Booking Your Water Heater Inspection in Greater Vancouver
Once the immediate danger is under control, a full inspection tells you whether to repair or replace. A good inspection checks the tank, the anode rod, the valves, the connections, and the expansion system. It also estimates how much service life the unit has left.
At Peace of Mind Plumbing & Heating Ltd., we aim to provide honest fixed pricing, and our services come with a 12-month guarantee. You can learn what a professional visit involves in what to expect from a professional service visit. If you are about to hire someone, how to find reliable Vancouver plumbers before you hire walks through what to check first. For an active leak, emergency plumbing repair in Vancouver explains how urgent help works.
Ready to get it fixed? Request service or call Peace of Mind Plumbing & Heating Ltd. today, and get a clear answer and a fixed price before we start.
Frequently Asked Questions
Why is my water heater leaking from the bottom?
A leak from the bottom of a tank water heater usually means water is escaping through the tank itself, most often from internal corrosion, a failed anode rod, or a crack. Drain valve leaks from sediment buildup are another common cause. Check whether the drip comes from the drain valve or from the tank wall. A tank leak generally means the unit has reached the end of its service life, and replacement is usually more practical than repair. Shut off the power or gas and the cold water supply before inspecting.
Is a water heater supposed to drip?
A water heater should not drip continuously. Some condensation can form on the outside of a new unit when it first fires up, and that moisture can be mistaken for a leak. Occasional drops from the temperature and pressure relief valve during heating are a sign of thermal expansion, but steady dripping points to a fault. If water keeps dripping from the pressure relief valve, have a licensed technician check the pressure and the valve before the problem gets worse.
Can a leaking water heater be repaired?
Some leaks can be repaired. Loose fittings, a worn drain valve, or a faulty pressure relief valve are often inexpensive fixes. A leak in the tank itself, however, is generally not repairable, because the tank cannot be patched reliably. Tank leaks or burst tanks are generally considered the most common failure type, so a tank leak is a serious sign. Compare repair costs against the age of the unit before deciding. For an accurate assessment, request a quote from Peace of Mind Plumbing & Heating Ltd. through the website.
Should I turn off my water heater if it is leaking?
Yes, if the leak is active. For an electric unit, switch off the breaker. For a gas unit, set the gas control to the pilot or off position. Then close the cold water supply valve feeding the heater. Shutting off the power and water stops the heater from heating more water and limits water damage. Keep the area dry and avoid touching electrical components if the floor is wet. Call a licensed plumber to diagnose the leak before restoring power or water.